DIY Electric Skateboards: How to Build Your Own
Electric skateboards are awesome, they’re convenient, lightweight, compact enough to store at your work when you get there.
They’re… they’re expensive though, aren’t they?
When companies piece these together, they’re making their own parts and maybe buying some other pieces in bulk from manufacturers.
Basically, they can regulate the cost of most parts because they’re the ones actually making them.
A DIY electric skateboard eliminates all those problems.
Yes, it’s still going to cost you money to source the parts, but if you look at the price of electric skateboards that can actually be used for commuting.
Ones that can be reliable, that is, you’re going to find alarming tags.
Let’s cut down the price, make it special, and make it faster than what’s out there. Let’s put you ahead of everyone else on the road, starting now.
Electrify Your Normal Skateboard
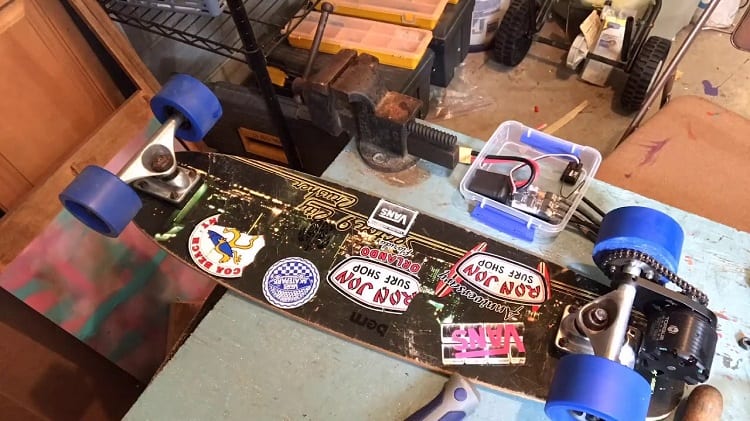
Yes, it’s possible to turn your standard deck into a completely electric skateboard.
No questions asked—you could do it. Heck, I could do it with minimal technical know-how.
There’s a few ways you can achieve it, so we’re going to get you prepared by going down a list of kits and gear that you’re going to need.
It sounds intimidating, but don’t worry: the entire process isn’t difficult, even if it can be a little time consuming.
I have no doubt that you’ll be able to pull this off, and finally motorize your skateboard.
Keep in mind before you look at kits, we need to take a few precautions into view so you don’t waste money on something you can’t use.
What Type Of Gear Do You Need?
You need a board with four wheels, an electric drill (with drill bits), screwdriver, battery, motors, and the remaining elements of a kit.
I cannot stress the most important piece of gear imaginable—a clean and clear work station.
There are going to be washers, tiny screws, and elements of your kit that you really don’t want to lose.
Additionally, you should also have an anti-static mat for temporary storage of your lithium-ion battery.
You won’t be adding this until the end, so having it somewhere safe like this is going to seriously benefit you.
Ensure your assembly area is well-lit. Whether you’re using a kit or getting all the pieces yourself, you’re going to need a clean and clear space to keep track of all your parts.
This also just helps in general during cramped assembly parts where visibility is everything.
Electric Skateboard Kit
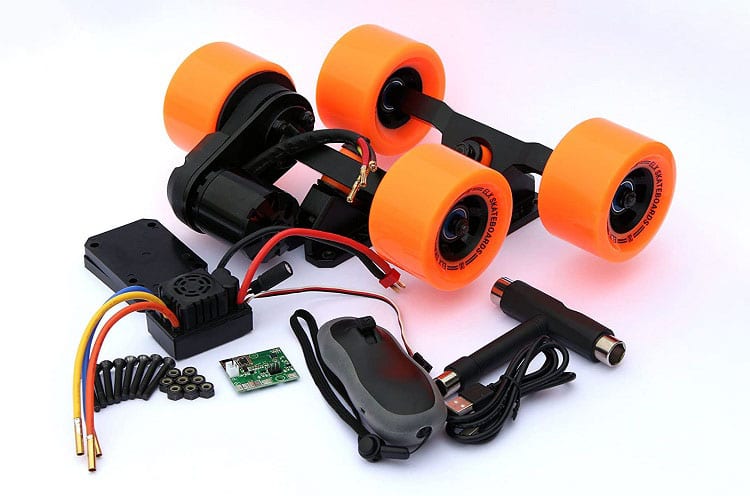
You can purchase a fully decked-out electric skateboard kit. It will come with just about everything you need, although almost all the time, you need to purchase the battery pack separately.
That’s a whole different beast to tame, which we’ll talk about in a minute.
Basically, you can get any kit, and it will come with everything you need for conversion and installation.
The kit we’ve chosen to use as an example is the Dual Motor Mechanical Kit from DIYelectricskateboard.com, which isn’t exactly cheap, but it comes with everything that you’re going to need.
DIY Motors
You can use what comes in a kit, or you can make your own. Motors are one of the most complex pieces of machinery to make.
You can even ask around a garage with a dozen mechanics, and they’ll all point to the one guy who knows more than they do on the core components of motors.
It’s best to get motors that match the electrical output of your battery, which we’ll dive deep into shortly.
The motors are going to come with specific axles that have a designated wheel size in mind.
This isn’t a hindrance like people think, because you can modify the axle holes on board wheels so that it matches up.
If the axle isn’t the right size, your wheels are going to jangle around, which not only makes for a bumpy ride, but kills most of your speed. They have to be nice and tight on those axles.
DIY Battery
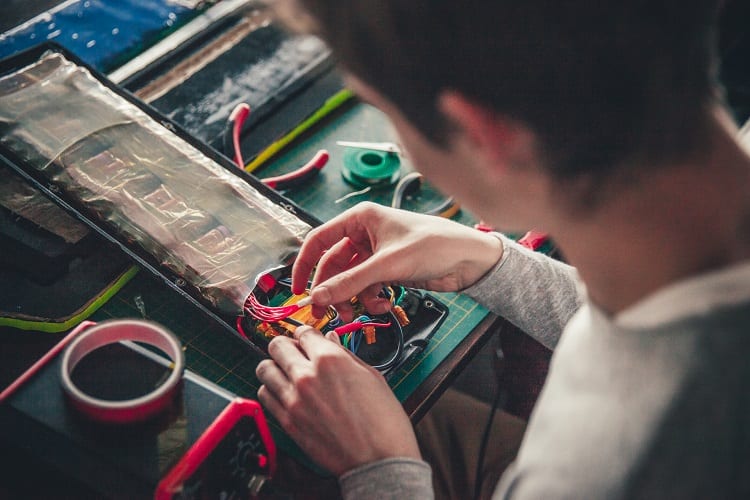
You can go on a site like Mboards.co and find a ton of batteries that come with the wiring and everything, and they’re already included with the price.
It’s not one of those things that are like “Keep in mind the wires cost separate” or something like that.
A DIY battery isn’t really something you make, it’s just a separate battery that you purchase with this sole purpose in mind.
You can get a brand new battery from Mboards, or you can repurpose older lithium-ion batteries from around the house.
Robot vacuums, laptops, whatever you can get your hands on. You just have to make sure the electrical requirements match up.
Tune-Up Kit
Tune-up kits sound like something you don’t really need, but you’re going to get stuck with anyway.
I can tell you: tune-up kits are necessary. If you don’t have one, get one as soon as possible.
If you’re going to DIY your own skateboard, you have one amazing benefit: you literally know your board inside and out.
You know where everything is located under the hood, so you know what to look for, what’s lacking, and where to tune up.
You know, there’s also YouTube tutorials to help if you get stuck, but all I’m saying is it’s a one-up on everyone else.
A tune-up kit should be used regularly. We’re dealing with a relatively small thing, here, with not too many working parts.
When one aspect of your board fails, everything else that’s leaning on it will fail as well.
You’ll be at the helm to diagnose and repair issues, and with a tune-up kit, you can ensure those repairs have longer gaps in between.
How Difficult Is It To Install?
Installation isn’t complicated, it’s just time-consuming.
It might not seem like for this little board, you actually have to do a whole lot, but you’d be surprised. Total installation time can take one to two hours.
As for difficulty, the only thing you really need to be concerned about is your own personal experience with tools.
If you’re somewhat handy and have no problem being comfortable with tools in your hands, then you’re A-okay.
It’s still going to take time, but there won’t be this skill ceiling over handling the tools.
The biggest difficulty—and I kid you not—comes from your workstation. You need a raised, flat, clean, bright workspace to do this.
Most people choose the dining room table or something along those lines, and that’s fine, but it’s definitely going to be best in a garage on a proper workbench that you can stand at.
If that’s not available, just use whatever you can, you just want visibility so you don’t install something incorrectly.
Which Lithium-Ion Battery Should I Buy For A DIY Electric Skateboard?
Now it comes down to specific battery choices.
It’s rare, but maybe you already have a battery laying around that meets some requirements.
It’s not likely, but if you do, feel free to use it. High-performance gaming laptops are known to have some similar batteries that can work well.
There are three main things that you want in an electric skateboard battery: high discharge rate, the right voltage, and a good capacity.
- High Discharge Rate: This means how fast it actually discharges the electricity that’s stored inside. The faster it comes out, the quicker the high wattage motors can utilize it. A faster discharge is relative to the speed of your electric skateboard. Low discharge rates ensure that you won’t get up to speed as quickly, and you certainly won’t stay there. You want higher discharge for more power on your board, you know, if speed is something you care about.
- The Right Voltage: Converting watts and volts can be a bit mind numbing to most people, and I totally understand it. You need the right voltage in your battery for the motors that you have, otherwise you aren’t going to convert energy properly and you’ll kill your battery life. Either that, or you won’t get the proper output and your motor strength won’t matter as much. Most voltage numbers in batteries are affixed to 12/24/36, so it shouldn’t be too hard to pick a good one.
- Good Capacity: This is the mAh rating on the end of a battery description. Commonly, in electric skateboards, you’re going to see 12000 to 14000mAh. This is a fairly good capacity, but 18000 and 20000 are high-end. The more mAh in your capacity, the longer your battery will last. It’s not uncommon to see short runtimes for electric skateboards, whether that’s 30 minutes or 45 minutes. This applies for commuter-ready electric skateboards as well.
How Fast Can You Make A DIY Electric Skateboard Go?
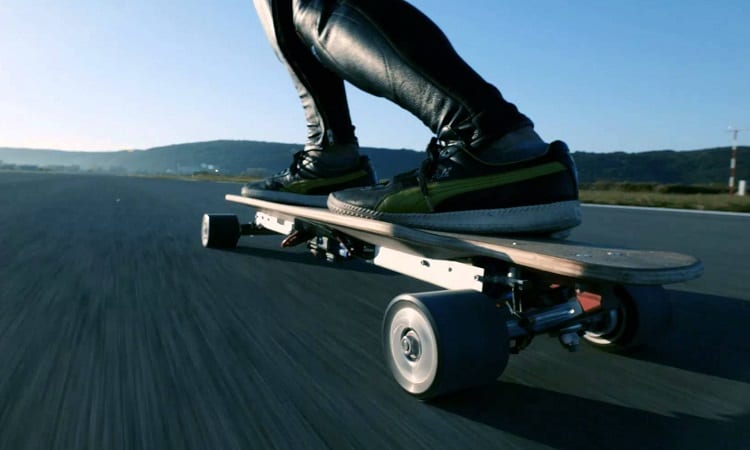
It depends on the motor and how much electricity/power it’s going to use.
Overall, you’re not going to want to kick this into high gear more than it needs to be, otherwise you’ll end up getting a ticket. Seriously—these things can be fast.
Most DIY electric skateboards come from you, a screwdriver, and a kit with all the necessary parts in it. You can order one, and set up your skateboard in practically no time.
But there’s a more hardcore way of going DIY with this. If you get your own motors for the wheels and exceed 1100W on each, you could pick up speeds up to about 40 MPH.
That’s probably twice the legal speed of the limit on your street right now.
Companies that make board mods and transfer kits don’t want to be held liable because you make a super fast board and then fall off.
At least, most companies. There’s a certain company that has pushed the boundaries past anything we ever thought possible.
There’s a board called the NGV Nextboard, and it goes a staggering 68 MPH. That’s not an exaggeration—that’s a board that matches and beats highway speeds in the United States.
These are ridiculously high and dangerous speeds that you should be covered up for, from head to toe, and fully know the risks.
I’m not here to put a damper on your fun; fast boards are fun boards, and we all know this.
I just want you to know that it’s not realistic to chase this kind of MPH expectation in any DIY board. These require high-end motors and a powerful battery.
The faster your board can go, the faster it’s going to drain your battery, meaning you’ll need to up the ante on your battery quality right from the start.
You could end up spending low thousands for a super fast board that can sustain your weight properly, and without tipping over at high speeds.
What’s The Legal Speed Limit For Electric Skateboards?

You are bound to the rules of the road, no matter what.
If you mod a skateboard and it can go 21 MPH, and you push it to the max in a school zone, you’re going to get fined just as if you were operating a car.
I know that sounds ridiculous, but even cyclists have been fined for stuff like this in the past.
However, the legal speed limit doesn’t matter in certain places, which is one of the reasons people end up going for “toy-like” electric skateboards.
States like California have bans on any motorized skateboard that can move on its own without manual operation.
But the thing is… it’s only classified as a motor if it’s over a certain set of electric standards.
Otherwise, RC cars would be illegal to use outside, too, and that’s just a bit ridiculous.
The limits on a lot of these motors are fairly low, meaning even if you do pass the levels, it will be with a very underpowered skateboard. It’s bogus, but it’s the way it is most of the time.
For most areas, you’re not going to find a separate speed limit that is only enforced to people on electric skateboards and unicycles.
Keeping that in mind, it’s actually illegal in most parts of the country (narly everywhere) to ride a bicycle on the sidewalk, and those laws tend to extend to anything that isn’t a trolly or baby carriage. You have to proceed with caution.
You’re stuck in the middle: you can’t make it too fast, but you still have to ride it in the street, especially if you’re commuting with it.
Most municipalities will have some form of regulation for electric vehicles that are not cars, so it’s wise to take a look at your local resources to determine if you can use one or not, DIY or otherwise.
Most cities are trying to promote electric vehicles and commuting without cars cluttering up the streets, so if you’re in New York, Chicago, or Boston, you’re more than likely to be okay.
Are There Any Dangers/Concerns With Doing This Yourself?

You’re dealing with tools, a lithium-ion battery, and possibly power tools depending on what you have.
Yeah, there are dangers associated with this DIY task, just like there are with any other tasks.
I want to give you some guidelines to go off of so that you can stay safe no matter what.
- Proper Battery Handling: If your battery is mishandled, you can leak the contents, which can cause chemical burns to the skin and potential blindness if it gets in your eyes. We deal with lithium-ion batteries every single day in our cell phones, laptops and more, they’re just usually beneath a layer of plastic. Out of sight, out of mind. When dealing with the enclosed battery pack, be sure it’s stored in proper temperatures (before and after applying to your board), and that you’re not putting screws through it. Simple enough.
- Electrical Tool Management: You don’t need much for this project, but if you are using any electric tools, follow standard safety precautions: keep extension cables out of the way, don’t place tools near water, and wear hand/eye safety wear so that you don’t end up with an injury that you don’t see coming. Sawdust and metal shrapnel gets absolutely everywhere.
- Ventilation: Just in case of shavings or dust getting into the air, do this in a well-ventilated area. You should also be wearing a mask of some sort so that you aren’t inhaling anything that’s coming up off of your board.
Electric Skateboards With No Limits
Electric skateboards can get expensive both in terms of the initial price, but also the upkeep costs associated with it.
Many of us have more time to burn than we do money, so why not do it yourself?
You can achieve higher speeds, dabble with the total weight, and you’ll know the system better than anyone else—when it comes time to replacing your battery, wheels, or anything else, you’ll already have all the information on how to do so right in the palm of your hand.


